Getting started with CREAM v.2.0
Contents:
- Generation of mutants
- Setting working directories
- Mutation options
- Comparing the
mutant
with the original program
- Showing the parse tree
- Showing the class
hierarchy
of the program
- Testing the mutants
- Saving and loading the tests' configuration
Generation of mutants
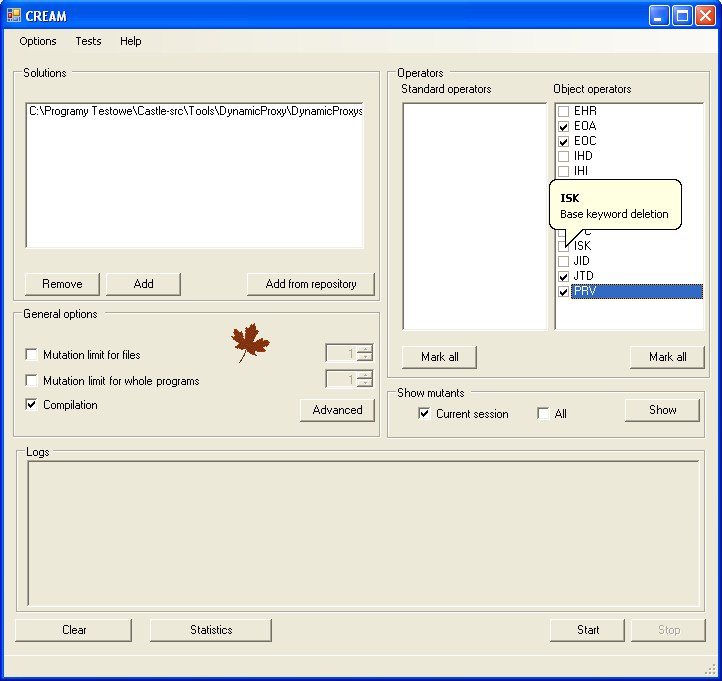
The main window of CREAM looks like the figure below: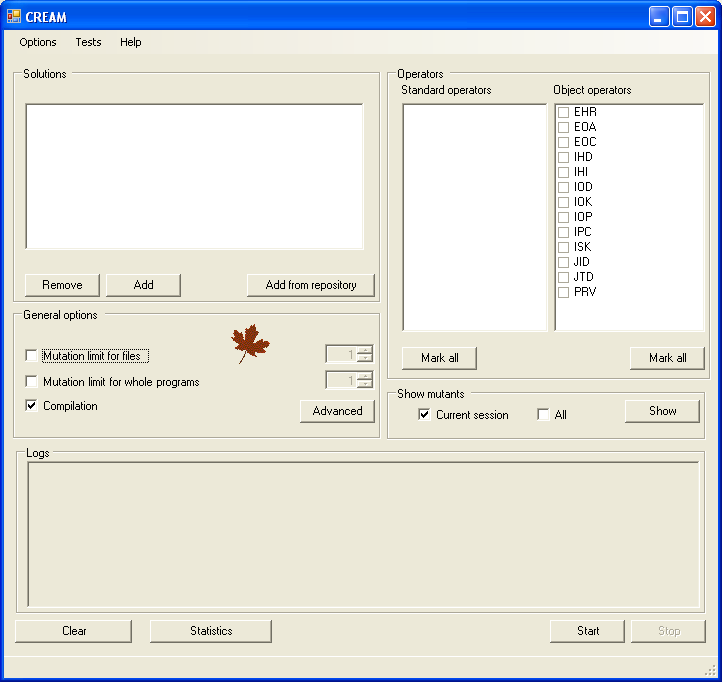
Setting up the general settings
General settings will be applied to all programs while loading. As there is still an opportunity to change them later, it is useful to set up the most common setting at the beginning.Mutation limit is a number of mutants created for any file or whole the whole program.
Compilation flag says if there is a need to compile mutants.
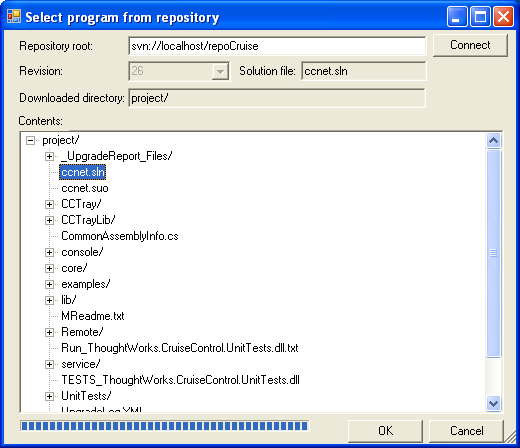
Choosing the programs program to be mutated
CREAM Visual Studio 2005 solutions located in the local disk or in the running repository.Choose the programs to be mutated pointing the *.sln file. Just after a moment they will appear on the list.
In the next figure you can see the window in which you can browse the repository.
Choosing the mutation operators
There are mutation operators gathered on the right list. Only these of operators will be applied to the selected programs which are marked. You can use Mark all buttons in order to select unselect all operators.Customizing mutation options
Options of every program can be customized in the window like the one below. The window can be opened by pushing the Advanced button or byopening Options -> Advanced from the main menu.
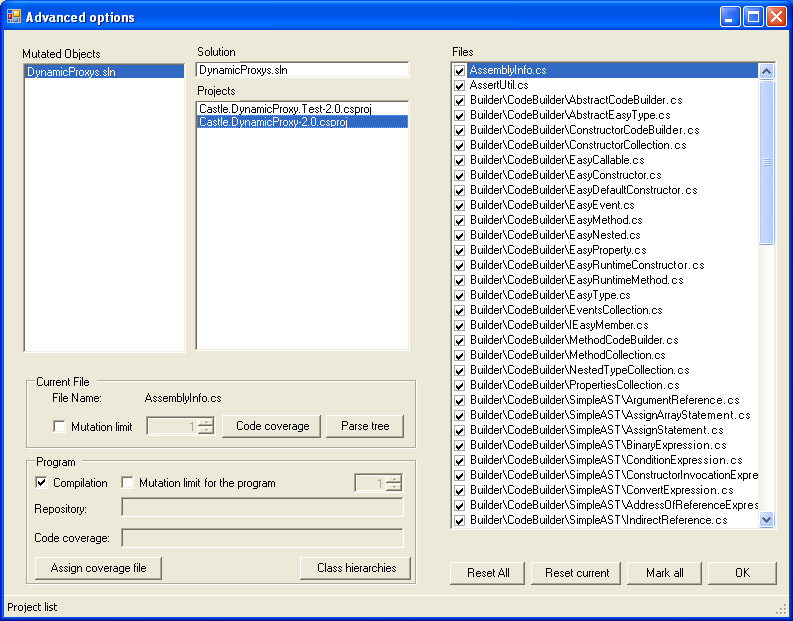
All marked files will be mutated. If the Compilation option is set mutants of the program will be compiled. Setting the limits of generated mutants is not obligatory but is a useful option.
The class hierarchy for the program and a parse tree for each properly parsed file are available under the appropriate buttons.
You can also assign a code coverage file generated by the Tester tool (button Assign coverage file). It helps avoiding the generation of the mutants that cannot be killed due to incompletness of the test suite.
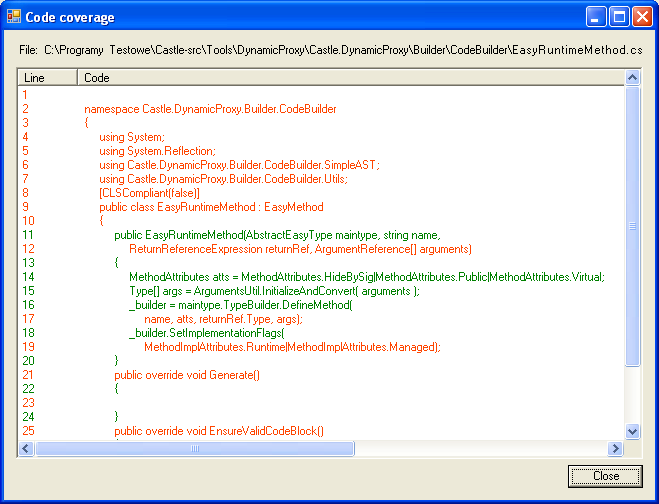
You can observe code coverage of each file when the button Code coverage is pressed.
Performing mutation
The code of mutants will appear in MutatedCode directory. If the program is a Visual Studio 2005 solution its binaries are stored with the code.
Assemblies of mutated single file programs are located in MutatedPrograms directory. These folders are created in application working directory
unless specified a different location (Main Menu: Options - > Working directories).
Setting working directories
There are two types of working directory used by Mutation Tool:• Input source directory - is the default directory where the Mutation Tool looks for the programs to be mutated
• Target directory - the directory where the subdirectories MutatedCode, MutatedPrograms and OriginalCode will be located.
To see the dialog box like the one below select the entry: Options -> Working Directories from the main window menu.
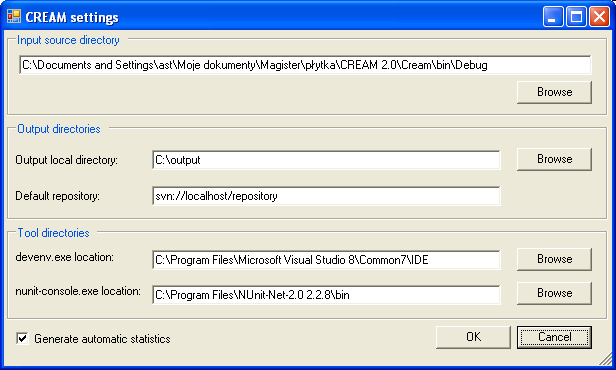
You can also set up the input source
directory and paths to the Visual Strudio 2005 (devenv.exe) which is
neccessary to compile the mutants and NUnit (nunit-console.exe) which
tests the mutants. Moreover there is a possibility to generate
statistics automatically when the tool is being closed.
Mutation options
Mutation options are:- Mutation limit for files
- denotes the maximum number of mutants generated from each file
- Mutation limit for whole
programs - relates to the general number of mutants generated
for the program
- Compilation - if checked, the mutant will be compiled
earlier loaded files. In order to change options or to specify them separately for some files press the Advanced button or choose Options -> Advanced from the main menu.
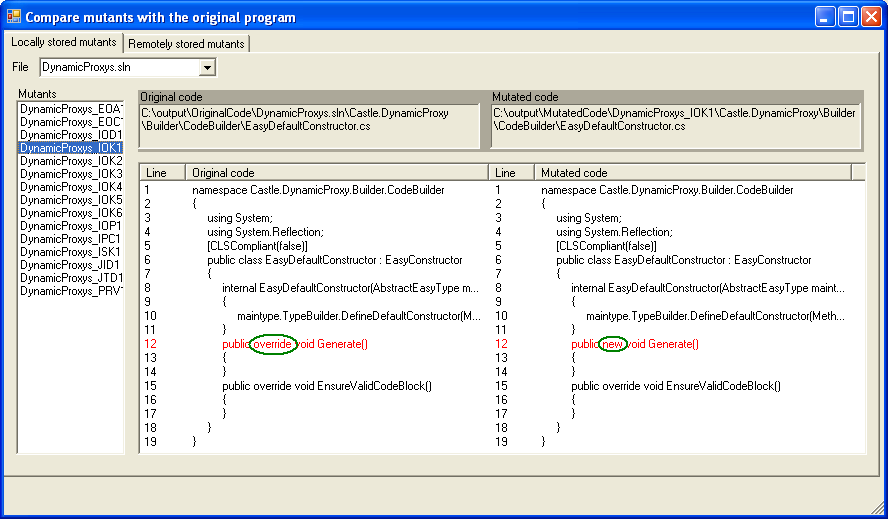
Comparing the mutant with the original program
If you are interested in comparing the behavior of mutant and the original program go to chapter Testing mutants.In order to see the changes in code between an original program the following steps should be done.
The user should decide if the comparizon concernes all mutants available in MutatedCode directory that have the original code placed in OriginalCode or if the compare frame will show mutants of the current session only.
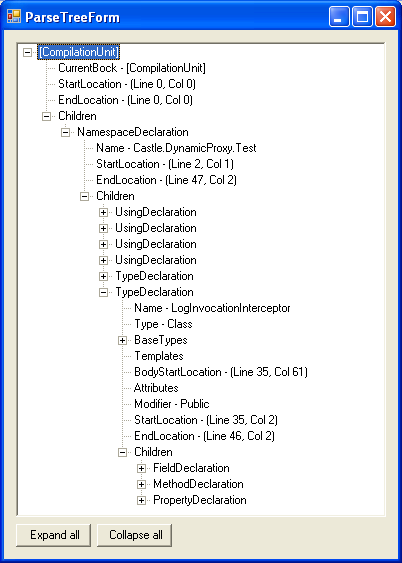
Showing the parse tree
Parse trees are available for loaded programs. The program is loaded after pressing the Add button in the main window and selecting the program.The Advanced button or choosing Options -> Advanced from the main window opens the form like the one below.
If only the file has been properly parsed the figure similar to the one below should appear to you after selecting the file and pressing the ParseFile button.
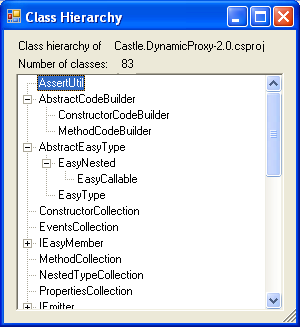
Showing the class hierarchy of program
Class hierarchies are available for loaded programs. The program is loaded after pressing the Add button in the main window and selecting the program.The Advanced button or choosing Options -> Advanced from the main window opens the form like the one below.
The Class Hierarchy window opens if te project is selected and the Class Hierarchies button has been pressed.
Testing the mutants
Tests' Configuration windows can be opened from from the main window menu (Tests > Run Tests). It is used for specifying the details needed to run tests automatically. It is also possible to load an existing configuration file and save the configuration. More information covering this topic in chapter Saving and loading tests' configuration.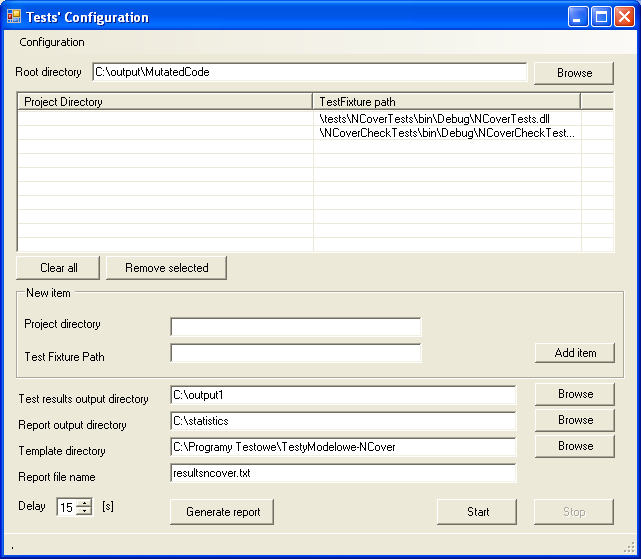
Settings:
Root directory - the directory where mutants are located
Project Directory - the relational path to the main project directory
TestFixture Path – the path to the assembly having the tests inside.
Check the Solution option if tested program is a Visual Studio 2005 solution otherwise check the Single file program
Test results output directory - the directory where results of the tests (xml files) will be saved
Statistics output directory - the directory where the file containing a detailed summary will be located
Statistic file name - the name of the file containing the statistics. There are placed all information about killed and alive mutants for each
project in the statistic file.
Delay - a number of seconds between the succesive runs of the NUnit
The New item panel and the buttons: Add item, Clear all and Remove selected help in managing items in the list.
The button Statistics starts generation of the statistics for the tests’ results available in Test results output directory.
The Start button runs starts and the Stop button terminates the process of running NUnit tests.